Proper body alignment can reduce the risk of injury, pain, and discomfort. It can also enhance performance for any kind of physical activity. Athletes, dancers, musicians, massage therapists, carpenters and others can benefit from increased body alignment awareness. A body well aligned has more power, efficiency and is less prone to injury.
If one’s job or hobby requires a lot of sitting during the day (driving, sitting at a desk in front of the computer, for example) it will be important to take breaks during the day to move and tune in to your body. In addition to stretch and strengthening exercises, awareness exercises can help align and increase body awareness. Improved body awareness is invaluable for any exercise program, walking, daily living.
Body Awareness Exercise: Stand with your feet about hip width apart. Bring attention to your breath and begin to scan your body. Take note of your alignment and any feelings of stress or discomfort. Notice where your head is in relation to your shoulders and pelvis. Imagine dropping the pelvis down towards the floor.
Bring your attention to the soles of your feet. How do the soles of your feet feel against the floor or mat? Is there more weight on one foot or the other? or one part of the foot more than another? How does the floor feel against your feet? Shift the weight from the heels of your feet forward toward the balls of your feet, slowly back and forth. How does that affect the alignment of your head? When the weight is far back on the heels, the head, in an effort to to counter-balance, will move far forward. Imagine the soles of your feel against the floor like a tripod with weight distributed between the balls of the big toe, little toe, and heel.
What occurs in the pelvis (and up and down the spine) affects head alignment. Drop the pelvis down towards the floor rather than (do not place) pushing the pelvis into a posterior tilt (tucking forward and under). Notice if there is any forward rounding of the shoulders, imagine the release of tension and open the shoulders and chest.
Ease your head back so that your ears come in line with your shoulders. The cheek bone should be in line with the top portion of your sternum. You can try this exercise while placing your fingertips side by side on either side of the neck. Beneath your fingertips you will be able to palpate portions of the scalene muscles and the sternocleidomastoid muscle. As the head eases back into alignment, how does your body respond? Perhaps you experience shifts in alignment such as at the base of the head, shoulders and pelvis, soles of feet.
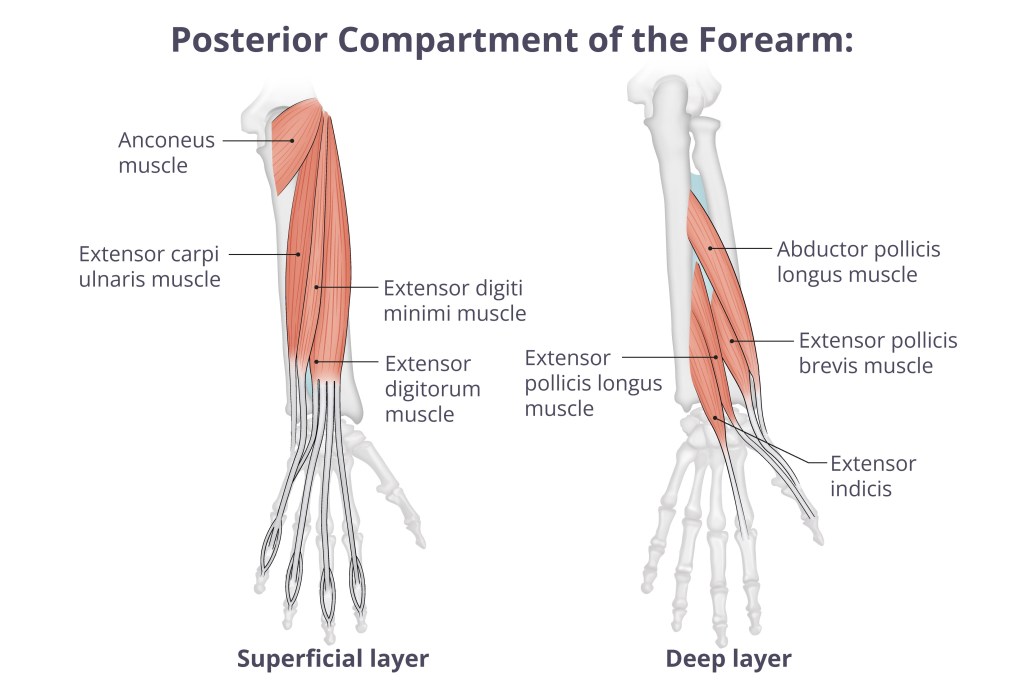
Muscle tension and trigger points can be effectively addressed using a lacrosse massage ball, soft massage ball, or tennis ball. Follow the steps below to relieve muscle tension and pain in the flexor and extensor muscles of the forearm.
To address the flexor muscles of the forearm, place the anterior side of your forearm on top of the ball, positioning it on a flat, hard surface such as a table, bench, or the seat of a chair (as seen in the image above).
At a slow to moderate pace, roll the ball and search for areas that feel tender or exhibit signs of muscular pain.
When you find areas requiring attention, pause and maintain pressure; breathe with the intention of release with a sustained melting pressure. Hold the pressure and sink into the ball allowing a little time for release.
To increase the intensity, consider applying the “Pin and Stretch” technique: Using the ball to apply pressure into the anterior forearm raise your hand up towards the ceiling (forearm stays on the ball) and return. Repeat. Explore doing the “Pin and Stretch” with fingers straight and fingers softly curled. This will help target different muscles. The Flexor Digitorum Profundus muscle attaches to the distal phalanges two through five. The Flexor Digitorum Superficialis muscle inserts at the base of the middle phalanges. The placement of the fingers will change the intensity and intent of the stretch.
To address the posterior forearm (extensors) you can turn your arm so that you can roll the ball similarly as the anterior forearm. If that feels uncomfortable, roll the ball on the forearm with the other hand.
To “Pin and Stretch” the extensors: If you are rolling the ball with one hand on top of the other forearm, place your hand at the edge of the table, bench, or chair so that you can move and stretch the hand downward towards the floor and return. Explore the movement with fingers straight and alternatively curled into a soft fist. Because Extensor Digitorum inserts into the middle and distal phalanges two through five, curling the fingers into a fist will help target the muscle.
Incorporating this type of self care routine can be an effective way to relieve forearm muscle tension and pain. Whether you choose to use a lacrosse massage ball, a soft massage ball or tennis ball is based on individual preference. I personally like the weight and rubberized texture of both the lacrosse and massage ball. Both provide more firmness than a tennis ball; the lacrosse ball being most firm. The rubberized texture of a lacrosse and massage ball provides more grip on the surface you are using. A set of lacrosse and soft massage balls for the purpose of self massage are often sold together as a set.
Practices that promote deep relaxation offer an opportunity to close the doors to the outside noise and to go within. With a relaxed body and calm mind, being with oneself, in the moment, can be sublimely restorative. Meditative relaxation practices entail bringing awareness to the body, letting go of physical tension, and noting one’s experience with no judgement – simply experiencing the moment. When thoughts arise, as they inevitably will, witness but do not try to control or analyze. Simply being present – in the moment – fosters a state of being that can be, with practice, restorative and empowering. Taking time to integrate meditative relaxation practices on a regular basis
reduces stress
promotes a restful state of being and restores
integrates body and mind
improves body awareness
enhances problem solving and creativity
regular meditative relaxation can deepen connection to one’s intuition
There are multiple ways to experience a state of deep relaxation:
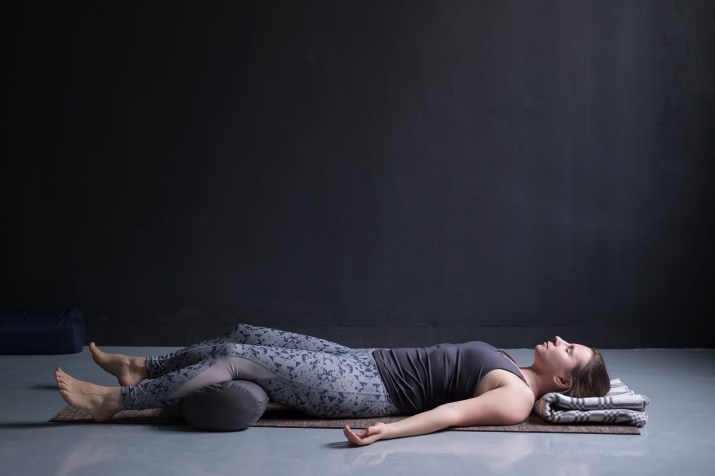
Savasana: The word means corpse pose in Sanskrit. It is usually done as the last asana in a yoga class. Lying supine in a position that supports relaxation, the pose usually will last for five to ten minutes. You can choose to stay longer. Savasana promotes integration of the yoga poses that preceded. With practice, a person can learn how to relax not only the body but also quiet the mind. Some suggest that this is the gateway to self realization or self empowerment. In his book Yoga: The Path to Holistic Health, B.K.S Iyengar writes, “Relaxation begins from the outer layer of the body and penetrates the deeper layers of our existence (172).
Body Scan: To begin, one lies supine on a padded surface such as a yoga mat placed on the floor. It is important to find a comfortable position that supports relaxation. Props may be beneficial in helping to alleviate discomfort. For example, a bolster pillow can be used for under the knees or/and a pillow to support the head. A warm blanket can be useful as feeling cold can make it difficult to relax and move into a relaxed, restful state. Body scanning puts intention on bringing awareness to one’s body as a whole as well as specific areas of the body: toes, feet, thighs, hips, sacrum, abdominals, ribcage, diaphragm, hands, arms, and on up the body. One observes and notes how each part of the body feels such as temperature, weight, feelings of tension and other sensations. Following, one can meditate by bringing the attention to the breath and simply being in this moment. A deeply restful state requires the mind to step aside. Recognize that it is natural for thoughts to arise; as they do, avoid judgment, simply observe them and let them go. With consistent practice, it becomes easier to move deeper into the practice. The idea is to move into an aware and restful state while not falling asleep. Body scan meditation likely came about from long ago Buddhist mindful meditation traditions. In the 1970’s Jon Kabat-Zinn brought body scan meditation to a large western audience as part of his Mindfulness-Based Stress Reduction (MBSR) Clinic. His teaching and contribution linking mindfulness to improved health and well being has led to “a growing movement of mindfulness into mainstream institutions such as hospitals, schools, corporations, prisons, and professional sports organizations” (Kabat-Zinn, 165). He is the author of Mindfulness for Beginners, Wherever You Go, There You Are and numerous other books.
Guided Imagery uses deep relaxation and visualization to help manifest certain goals. The participant begins by lying supine on a well padded mat on the floor (or sits in a comfortable chair) and is guided into a state of relaxation by a therapist or instructional audio. Alternatively, the participant can come up with their own script, read and record the script, and play the audio for their guided meditation. Guided imagery can be used for a number of different objectives. For example, visualizing a calm and happy environment in nature (images, sounds, and smell) can help alleviate stress, anxiety, and promote a sense of wellbeing. Guided imagery can also be used to enhance performance. Professionals in sport related fields often use imagery to enhance achieving their goals. To enhance performance a gymnast might review in her or his mind an intended well performed gymnastic move. Guided imagery can also be used to help heal or alleviate pain, discomfort.
While it does come more easily to some than others, visualization skills will improve with practice. In his book YourPast Lives, Michael Talbot offers an exercise for those who find it difficult to visualize: Closing one’s eyes, the person visualizes the room they are in with as much detail as possible. If necessary, one can open their eyes and view the room, taking note of furniture and other details potentially missed. With eyes closed, the exercise continues, “making your mental image as real as possible and holding it for as long as you can” (Talbot, 98).
Floatation: Floatation-REST (Reduced Environmental Stimulation Therapy) provides an environment that is designed to promote a meditative state and inner perception. For those who have never meditated or have found meditation difficult, floating can be a helpful introduction. In a Ted Talk presentation titled The Amazing Thing ThatHappens When You Disconnect, Neuroscientist Dr. Justin Feinstein describes a floatation study where participants with high anxiety, and in some cases depression, “reported the spontaneous induction of a meditative state” (Feinstein, 2020, 15:15). Studies have shown that floatation reduces anxiety (8:23), reduces blood pressure (11:37) and relieves muscle tension and pain (9:45). Floatation occurs in a shallow mixture of water and magnesium sulfate. The high concentration of epsom salt allows one to float effortlessly, creating a sensation of weightlessness and freedom from the usual effects of gravity. Floatation tanks come in various forms, including pods, cabin rooms, pods, and open pools. All offer equal benefits. Cabin rooms and open pools, however, are good options for those who might avoid floating due to claustrophobic feelings of being in a small space for a long time.
A floatation spa offers the client a private room for the full sixty or ninety minute float session. The room comes equipped with a shower, float cabin, pool, or pod. It is important to shower before and after your float session to wash and shampoo off oils before entering the float tank and wash off salts following. Floating is usually done with no clothes on. A float cabin has a swing door for easy access in and out of the cabin. A person can choose to float the entire session in complete darkness and no sound or to float with dim lights on; as well as have relaxing music. Ideally the float lasts the entire session; however, a person is free to step out of the float tank at any time if they wish. The room allows for complete privacy for the entire session.
With all meditative practices, experience enhances the ability to move deeper into the practice.
I was excited when I came across Walter Truett Anderson’s The Upstart Spring: Esalen and the Human Potential Movement: The First Twenty Years as I had long been interested in individuality and human potential. Esalen fostered exploration in human potentiality and a new world view. A historical account of an American cultural revolution, The Upstart Spring is an absorbing and fun read. Anderson takes the reader through the history of Esalen Institute in Big Sur, California starting from it’s inception in the 1960’s. Founded by Michael Murphy and Dick Price, they brought a number of well known figures to lead seminars such as Aldous Huxley (English author and philosopher), Abraham Maslow (American psychologist), Joan Baez (American singer), Ida Rolf (creator of Structural Integration. Also known as Rolfing), Fritz Pearls (German psychiatrist. Developed Gestalt therapy) and many others. Anderson shares this culturally important history with care and honesty making for an entertaining, sometimes sobering, and informative read. Esalen, over fifty years later, continues to offer workshops and continuing education in arts, psychology, meditation, massage, and movement.